Warrior (Rift)
Weapons, tactics, and combat are the mainstays of a Warrior's life. Both the barbarian raiding a village and the knight commanding a column of troops adhere to the tenets of discipline, personal combat, and martial training. Every Warrior knows how to fight in close quarters, to take a blow and deliver a mortal wound in return. As the elemental forces have closed around Telara, a growing number of Warriors have incorporated magical techniques into their martial styles.
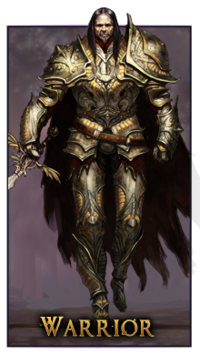
Warriors excel as lone combatants or within a larger force, depending upon what fighting styles they have mastered or choose to employ. Warriors as a Calling have no shared ethos or background, but their training, mastery of weapons, and enduring nature unite them in spirit. The noble barbarian and corrupt knight meet as equals on the battlefield.
Classes
During Gameplay you have the opprotunity to aquire more souls to use in your Soul Attunment system. Some of them in detail are as follows
Trainers
| Defiant | Guardian |
|---|---|
| Meridian - Tomas Urnhill | Sanctum - Regina Penthe |
| Freemarch: Ark of the Ascended - Thera Cor | Silverwood: Sanguine Shores - Lilith Shemerson |
| Freemarch: King's Retreat - Toria Stevens | Silverwood: Argent Glade - Relin Fittle |
| Freemarch: Kelari Refuge - Deenak Burghon | Gloamwood: Gloamwood Pines - Sergeant Hobbs |
| Freemarch: Denegar's Stand - Lise Stone |
| Neutral |
|---|
| Scarwood Reach: Perspice - Dersun Bane |
| Iron Pine Peak: The Chancel of Labors - Spalamala |
| Shimmersand: Fortune's Shore - Kedarik |
Gameplay
Front-line combatants without peer, Warriors reliably make up the core of any fighting force. These hardened and disciplined fighters seldom falter, and can be counted on to protect those weaker than themselves. But virtue is not a defining characteristic. Many Warriors conceal sinister motives, every battle a chance to slake their bloodlust.
A Warrior knows that the key to victory is to outlast one's foe, carefully waiting for the opportune moment to mount a devastating assault. To this end, Warriors will spend decades training their bodies, building up a reservoir of power to see them through any fight.
| Calling | Class | DPS | HEAL | TANK | ENHANCE | PET | Combat Type |
|---|---|---|---|---|---|---|---|
| | Champion |  | Melee DPS | ||||
| Reaver | | Melee Tanking | |||||
| Paladin | | Melee Tanking | |||||
| Warlord | | Melee DPS | |||||
| Void Knight | | Melee Tanking | |||||
| Riftblade | | Melee DPS | |||||
| Paragon | | Melee DPS | |||||
| Beastmaster | | | Melee DPS | ||||
| Tempest | | Ranged DPS | |||||
| | Vindicator | PvP |
Play Mechanics
The Warrior does not use mana. Instead he uses something called energy, which might remind you of stamina in other games. Energy replenishes much quicker than mana. Another interesting mechanic the warrior has are the action points. Action points are displayed as crossed swords under your health bar, the max amount of action points a warrior can have is 3. Certain abilities will give the warrior action points when used, and other abilities will consume action points. The efficiency of abilities that consume action points is based on how many action points a warrior has stacked. Using a finisher move when you have 3 points will be much more effective then using it when you have 1 point. Action points will remain unless the warrior chooses to use an ability that consumes them.
Equipment
Warriors are melee fighters who rely on heavy plate armor for protection as they close with their opponents. Many augment their armor with large, sturdy shields built to deflect even the fiercest blow. Others forgo this extra protection, wielding massive axes, swords, and glaives to cut a swath through their enemies.
As your power grows, you will discover sets of equipment that go together. Some of these sets (Battlegear) have a synergy with other items of the same set which make the whole of the set greater than the sum of its parts.
Cleric: Purifier • Inquisitor • Sentinel • Justicar • Druid • Warden • Cabalist • Shaman • Templar • Defiler
Rogue: Assassin • Nightblade • Ranger • Bladedancer • Riftstalker • Bard • Marksman • Saboteur • Infiltrator • Tactician
Mage: Elementalist • Warlock • Pyromancer • Stormcaller • Chloromancer • Necromancer • Archon • Dominator • Archmage • Harbinger
|

Information Sources