Hunter's Vale Guide
The Hunter's Vale
Locations
The Vale is accessed by right clicking on the Vale Vines that spawn inside the RvR lakes of the following zones. If you look at your map, the vines will be nearby the location of the Curse of Kurnous PQ. You can enter the Vale regardless of the current state of the PQ, although you cannot enter while in combat. When inside the instance, you receive the effects of Bolster for that tier.
- Tier 1: Blighted Isle (11 and under)
- Tier 2: Shadowlands (21 and under)
- Tier 3: Avelorn (31 and under)
- Tier 4: Caledor, Dragonwake, and Eataine
Hunter's Vale Map
Layout
- Red Mark - Entrance
- Gold Numbers - Locations of the Fallen Hunters
- Blue Numbers - Boss Fights
- Light Green & Red Mark - Rune Puzzle
The instance is laid out in a spiraling woodland path. Straying from the path is generally a bad idea, as there are a huge number of dryads along the sides of the path that will respawn when killed. As you can see by the handy map I've provided, the path kind of winds around the entire instance.
Walkthrough
This walkthrough applies to the Tier 2 version of the instance. The pulls and boss fights will be easier an Tier 1 and more challenging in Tiers 3 and 4. We went in with one tank, two healers, one mdps, and two rdps. While you do get bolster, it is still a big advantage to go in with a higher level group (just like in RvR). There weren't really any fights that we thought having another tank would have been advantageous, but I definitely recommend having two healers.
As you walk along the path, there will be several pulls of between 1 and 4 champion Dryads. Be careful! Kurnous will be displeased if you kill any of the rabbits or deer frolicking around. You get a debuff that will cause the large Tree-Kin patrolling up and down the path to aggro you. It's a tough fight, but not unwinnable, as long as you aren't fighting a whole ton of dryads at the time.
Make sure you click on the Fallen Hunters at positions 1 and 2 to get the unlocks and LE credit. When you get to the clearing near Fallen Hunter 3 on the map, there will be two huge tree-kin standing very still, with another dryad pull in front of it. When the last of the dryads is dead, the two bigguns will become active. This fight isn't too hard. Both tree-kin are basic tank and spank mobs with one small trick. Periodically, one of them will freeze and become immune to damage. At that point, just switch to the other one until it freezes. Go back and forth until they're both dead.
Continuing on, the next large clearing contains a huge swarm of non-aggressive sprites. These sprites will however aggro to anyone who casts a spell. They have a huge range, all link together, and constantly respawn. In the center is an larger champion sprite that will aggro in the normal way. You can sneak past it, but when we attempted that, the whole sprite pack teleported to use and destroyed us in the middle of the first boss fight. The best solution we found was to have the group hang back at the previous clearing, and have a melee or tank character run up and tag the champion sprite with an axe throw.
When you get to the first boss right clearing, you'll see a large tree in the middle, with another huge tree-kin in front of it. It's best to move all the way to the right side of the clearing against the edge of the cliff to avoid getting magic aggro from any remaining sprites. Standing near the tree-kin there are two non-aggro dryads. When you attack a dryad, a small swarm of spites will spawn in the woods behind you (and generally aggro your healers). They can be easily AoE'd down. When the second dryad is down the boss will become active. The boss has two major tricks. The first is to create some vines out of the ground that will do a fair bit of AoE damage. We couldn't see any way to avoid them, and the location and timing of this move seemed kind of random. The other move is to put a seed in someone that will tick down and then burst. When it bursts, the afflicted player will get knocked into the air, and a spite will spawn. These spites are pretty easy to take care of, but they will chew up your healers. The boss drops a piece of the PQ Set gear for that Tier.
After the boss does down, you can attack the large tree in the center. When the tree goes down, it fall across the gorge and become a bridge to the other side. Be careful! This next section is very challenging. When you aggro the first mob, small weaker mobs will spawn constantly until you reach the 'Mother' of that type. The first section is Canine (dogs), the second Lupine (wolves), and the third Leonine (lions). The idea is to move through as fast as you can until you get to the Mother mob. Once you kill the Mother, the mobs of that type will stop spawning. When we ran it, we couldn't locate the Wolf mother on our way through, so we had to deal with her as an add for the boss fight. I don't know if this is 'as intended' or a bug, but it was certainly annoying.
Ignore the number 4 Fallen Hunter until you've cleared your way to the Vine Gate that is located near Fallen Hunter 5. At this point, you should be through the gauntlet and can then go back and get the two hunters at your leisure. On the other side of the gate is the second boss, a huge lion. This fight is far more difficult than the end boss fight, in my opinion.
The Lion hits pretty hard, and at 80% he calls the Lioness to join the fight. The Lioness ignores taunt and attacks whoever she pleases. She doesn't do a huge amount of damage (unless she crits), but she's no slouch either. She can be snared, rooted, and slowed however. She also has the standard 'slow down at low health' mechanic. However, the boss Lion reported gets much more difficult if you kill his ladyfriend. We chose to ignore her and focus our damage on the main boss. Since you're not damaging her, it is worthwhile to detaunt her anytime she targets you to make it easier for your healers.
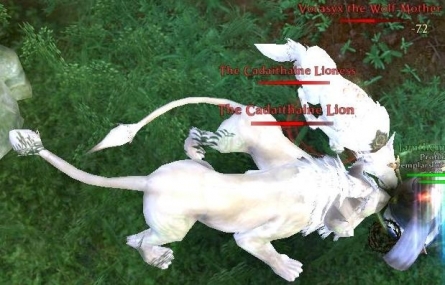
If you're unlucky like we were, and you have one of the Champion Mothers join you in the fight, it is probably a good idea to focus damage on it and take it out of the fight. We were periodically getting small non-champion Lions and Wolves during our fight as well. Again, I'm not sure that this is the way it's supposed to work. Once the Lion is dead, the fight becomes much simplier. Finish off any of the small adds that are up, and then take down the Lioness. This boss drops another piece of the Teir PQ set gear.
The clearing contains the rune puzzle. You'll see a center spire surrounded by a circle of stone. Set along this stone circle are square stones, 3 of which are marked with runes. Behind three of the blank runes stand large rocks. When you stand on one of these blank squares, a rune will light up on the rock behind you. Another member of your party needs to find the corresponding rune marked stone and stand on it. When done correctly, the rune on the ground will light up (don't step off the rune-stone). If done incorrectly, the whole party will take a hefty magic jolt. Once all three of the runes are lit, the puzzle will complete successfully, and friendly eagles will appear!
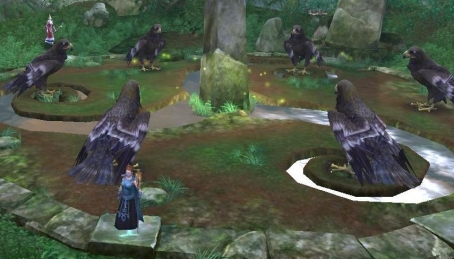
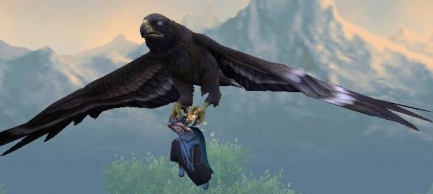
Click an eagle to get a one way trip to the boss's chamber at the top of the huge tree.
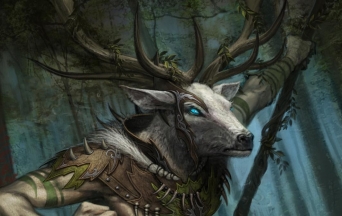
Spirit of Kurnous
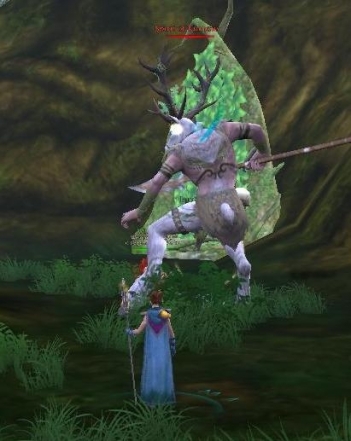
This fight isn't too bad (although it gets much more complicated during later Tiers). In Tier 2, it works like this: The boss starts off in Human/Stag form, as pictured below. After some time, he will do a big emote about taking on one of the three animal aspects (Leonine, Canine, or Lupine). I've read that these shifts are time based, or that they're HP% based...It just seemed random to us.
When he does this emote, he will crouch down and become immune to damage. At the same time, three friendly mobs will spawn (a Lion, a Hound, and a Wolf). You have about 15 seconds to click on the correct mob. If you click on the correct one (see below), you will get a helpful buff. If you click on the wrong one, the entire group will take a significant magic blast. If you go willy nilly and start randomly clicking on the, it's possible to take two of these blasts back to back (which will very likely wipe the group). Therefore, it's best to assign one of the rdps the job of animal-clicking.
As far as which mob is the correct one to click, reports vary. Some people say that clicking on mob that is the same as his aspect is the way to go. This didn't work for us at all. Others have said that you need to click on the mob that is 'superior' to the aspect he takes. This strategy worked for us. The table below is the order we used, although I can't guarantee it working for everyone. The important part is to only have one person click. It's easy to tell if it works or doesn't work so long as you can be sure which one was actually clicked!
| Kurnous' Aspect | Correct Mob to Click |
|---|---|
| Leonine (Lion) | Dog |
| Lupine (Wolf) | Lion |
| Canine (Dog) | Wolf |
During the animal phase, the boss gets an absorb-shield. After this shield takes so much damage, it will break, and the boss will go back into Human/Stag form. After the first transformation, the boss will start putting his Shock on people at random. This shock will do 100% of your health in damage over 10 seconds. Therefore you will die unless you get heals or take a potion. I'm not 100% sure, but I think I was able to cleanse this debuff off myself during the fight (this may not work for all tiers, however). In Tier 2, these two phases alternate until you kill him.
Kurnous drops another of the PQ set pieces, and one of the Fleet Stag Mantles (gives you a movement speed buff and transforms you into a Stag). There is no lockout timer on this instance, and it can be reset at will, so feel free to farm up cloaks for you whole group once you get it down!
In Tier 4, the boss fight is much more complex. There is also an additional reward for completing the entire instance within 35 minutes! Good luck, and good hunting!
|
