Iron Tomb Walkthrough (Rift)
Detailed map of the Iron Tomb
| Contents [hide] |
Walkthrough
The Iron Tomb is a level 19 dungeon and the first dungeon that will be available to Defiant starting players. It is a straight forward dungeon with linear progression and fairly simple mechanics. With that being said it is still dangerous to go in unprepared and that is what this guide is for.
You can find the dungeon entrance for the Iron Tomb at 6165, 4813 in Freemarch. Upon zoning in you will be immediately greeted by Eliam's Ghost and Alsbeth the Discordant. The two have a small and unpleasant exchange before Alsbeth heads deeper into the dungeon. Speak with Eliam's Ghost to pick up the quests Relics of the March Warden and Source of the Control.
Just ahead you will encounter the first monsters in the dungeon. There will be two types of fights from this point to the steps that lead to the upper level. The first group you will be fighting are packs of two or three Endless Spiritbinders, Endless Reavers, Endless Sharpshooters, Endless Pillagers, Endless Channelers, or Endless Cleavers. Simple focus fire tactics are enough to put these groups down. The other mob you will face this early in the dungeon is the Endless Phantasm. These lumbering undead hold no challenges individually but try not to pull them while you are fighting other groups of mobs.
After fighting through a few rooms of these you will find yourself at the base of a staircase. At the top of the stairs you will find a pack containing two Endless Wraiths and one Endless Apparition. The Apparition is a ranged mob and will stay right where it was when the pull is made. Be mindful of the Paroling Caor Ashstone as you will not want him to add while fighting this trash. After dispatching this pack wait for Caor to path away from the group and pull the pack of four Risen Corpses. With this side of the hallway clear it is time to fight the boss.
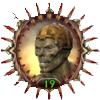
Boss: Caor Ashstone
| Caor Ashstone's Drops |
|---|
| Death Whisper Treads |
| Footpads of Restless Dead |
| Shade-Tarnished Girdle |
| Tomb Mason's Satchel |
Caor is a straight forward tank and spank boss with one complication. His 19,800 health pool will take a while to whittle down and during that time he will be attempting to stack up his Jagged Wounds debuff on your tank. The key to this fight is killing him before your tank becomes unhealable. It should be noted that a tank who can evade enough of his debuffing attacks will drop the stacks of the debuff.
There are two safe solutions to this. The first is to make sure your DPS classes are burning the boss as hard and for as long as they can. Make sure they start attacking immediately after the tanks lands his first solid blow. It would also be wise for the healer to get a few shots in early in the fight. The second option is to bring a DPS class that has a healing soul, like a rogue with a bard soul or a mage with a chloromancer soul. That way late in the fight when the damage gets particularly high they can switch to helping heal.
After putting Caor back to rest, finish clearing the hallway and head down the stairs. Be very careful as you descend the stairs, there is a pack of Risen Corpses at the base of the stairs and a Endless Phantasm that patrols there as well. Check the position of the Phantasm and when the time is right kill the pack of Risen Corpses. Wait for the Phantasm to return and put him down like the rest. Clear past two more packs near the stairs and you will be able to talk to Davian Crow to pick up the quest You Are Who They Call. Right next to Davian a chest will spawn, make sure to loot the Spectral Bane needed for the quest.
Head up the small set of steps and kill two more packs of Risen Corpses and another pack of Endless Wraiths and Endless Apparitions. Follow the larger staircase up and over into the room of the Three Kings.
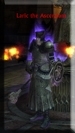
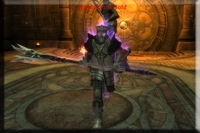

Boss: The Three Kings
(Derribec the Magus, Humbart the Bold, and Laric the Ascendant)
This, much like all the boss encounters in this dungeon, is a simple fight with one catch. As you descend the stairs into the Hall of The Three Kings Alsbeth will summon their ghosts. The first ghost to awaken is Humbart the Bold. Humbart has around 6,600 health and two special attacks worth mentioning. The first is a frontal cleave, so make sure the tank faces him away from any other group members. The second ability is a knockback against his target. To counter this have the tank put his back up against one of the statues in the room.
| The Three King's Drops |
|---|
| Gloves of the Magus King |
| Laric's Righteous Fists |
| Waistguard of the Bold |
After Humbart falls Derribec the Magus will spawn next to the statue on the right as you came down the stairs. Derribec only has 5,200 health and is mostly a push over, only having one ability worth noting. He will use a spell called Life rend on random party members. This can hurt quite a bit but should be easily healed through.
With Derribec down that leaves only one more king, Laric the Ascendant. Laric has 4,900 health and a spell called Unholy Mending that will heal for a significant amount if it is allowed to cast without interruption. Interrupting this heal will speed up the fight greatly but your DPS should be able to burn through Laric easily enough even without the interrupts.
Now that all three have been handled individually, it is time to deal with all three together. The kill order should be Laric the Ascendant because he will spend the entire fight healing either himself or one of the other kings. Then Derribec the Magus to remove his nuke spell from the equation. And finally finish off Humbart the Bold. The best strategy for tanking this part is picking up Laric and Humbart as soon as they spawn and drag them to Derribec. Tank the three of them here with the tanks back against Derribec's statue.
If you picked up the quest Relics of the March Warden at the beginning of the dungeon these bosses will have dropped Staff of Derribec, Horn of Humbart, and Targe of Laric respectively.
After The Three Kings have fallen the Spectral Trap will activate on the floor between the King's statues. On the side of this hall you will find the Spectral Screamers that must be captured with the Spectral Bane and lead back to the Spectral Trap for the quest You Are Who They Call. Once complete you turn the quest here as well.
Leave this room through the double doors that recently opened. Just inside these doors you will find Tobias Leighton who will offer the quest Laid to Rest. At the top of the stairs here two Veiled Rippers await. These two Bomani can put out a lot of damage and one of them should be crowd controlled if your group is capable. If not, make sure the group is focusing one of them down as fast as they can. Another Bomani and a couple Endless cult members await the group in the next room as well as the first of the three Death Shards in the dungeon.
When attacking the Death Shard be very careful. At ~80% a small group of Putrid Ravagers will spawn, at ~60% another larger group will spawn, and two more groups will spawn at ~40% and ~20%. If the group waits until the Death Shard is destroyed to kill the Ravagers they can overwhelm them. The best way to handle these is to wait until the second wave of Ravagers spawns and have everyone kill them off before continuing on the Shard. After the Shard is destroyed follow the hallway that leaves the room.
This hallway and the couple following it have a new pack of monsters in them. They will contain a mixture of Cruel Tormenters and Cruel Defilers. The Defilers are ranged so you will want to move to them an attack in order to group the mobs up better. These packs are not very difficult unless the group accidently aggros one of the wandering Veiled Rippers; in which case clever use of crowd control can save the day.
At the first tee intersection there is a table on the right hand side that holds the Alsbeth's Communication Device, the quest objective for Cutting off Communications. Follow the winding corridor into the next room where the second of the Death Shards can be found. Behind the Death Shard in this room there is a box that contains Alsbeth's Satchel for the The Saga of the Endless: Tombs of Old story quest.
Take the only exit to this room down the hallway and through a few more packs of monsters. Take care here not to aggro the Bomani and one of the packs of monsters at the same time. At the end of the hall you will find Alsbeth again, standing on a balcony looking across a gap at the final boss. Alsbeth leaves once more and you now have two options of paths to travel, even though they both lead to essentially the exact same place in the exact same fashion. Take either set of stairs down into the ominously dark room below.
This large room will be full of Shadowed Renders which will respawn very quickly after they are slain. The key to this room is to have your group huddle near the orbs that dot the floor. Each orb will activate when the group approaches it and AoE any nearby Renders. After about ten seconds the orb will go inactive and the group will have to hold their own until it activates again or they move to another orb. The tank should be the first one to travel from one orb to the next and the rest of the group should travel fairly closely behind. No DPS should be done to the shades and the healer should be extra careful about accidently pulling aggro during this phase. Try to time heals while no mobs are alive.
If the group heads to the small alcove direction under the balcony that they just came from they will find the quest item Bag of Amulets to complete the Source of the Control. From this point the tank should lead the group across the room to leave via the western exit. Travel up the ramp into the next room where four Endless Apparitions and the final Death Shard await them. When the room is cleaned of its undead infestation Tobias Leighton will appear and the group can turn in their quest and collect their reward. Take the path upward out of this room to the balcony and the final boss of the dungeon.
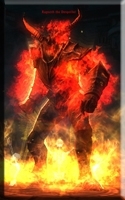
Boss: Ragnoth the Despoiler
| Ragnoth the Despoiler's Drops |
|---|
| Demonguard Bulwark |
| Despoiler's Tome |
| Ragnoth's Shadow Ripper |
The fight should go similar to this. The tank pulls Ragnoth and tanks him near where he spawns facing away from the group. Everything will proceed much like a tank and spank until Eliam spawns. As soon as Eliam's Ghost is spotted have everyone in your group hurry to surround him. After the Flame of Ragnoth has been cast (you will see large flames spiral out from Ragnoth) have everyone move away from the boss and the tank reposition him. Most of the time Ragnoth will only cast his Flame spell once.
After having slain all great undead and demon alike and driven Alsbeth from the Iron Tomb, Eliam's Ghost congratulates you and thanks you for your hard work. Every time this dungeon is completed and all three bosses are killed each group member will get credit for completing the quest Release the March Wardens. However you will not receive the item reward portion of the quest after the first completion. Congratulations on finishing the first of the Defiant zone dungeons! Hope you enjoyed this guide.
Quests
| Quest Name | Dungeon Objective | Reward |
|---|---|---|
| Cutting off Communications | Find Alsbeth's Communication Device | 3000 XP 8 40 |
| Laid to Rest | Destroy the 3 Death Shards | Choice of
You will also receive
|
| Release the March Wardens | Defeat | The first time this quest is complete you may choose one of the following
You will also receive
|
| Relics of the March Warden | Collect | Choice of
You will also receive
|
| Source of the Control | Find the Bag of Amulets | Choice of
You will also receive
|
| The Saga of the Endless: Tombs of Old | Finish the dungeon and find Alsbeth's Satchel | Choice of
|
| You Are Who They Call | Capture 10 Spectral Screamers | Choice of
You will also receive
|
Item Drops
| Caor Ashstone's Drops |
|---|
| Death Whisper Treads |
| Footpads of Restless Dead |
| Shade-Tarnished Girdle |
| Tomb Mason's Satchel |
| The Three King's Drops |
|---|
| Gloves of the Magus King |
| Laric's Righteous Fists |
| Waistguard of the Bold |
| Ragnoth the Despoiler's Drops |
|---|
| Demonguard Bulwark |
| Despoiler's Tome |
| Ragnoth's Shadow Ripper |
|
